Whether go the Core or Ryzen route – our best CPU for gaming list has our recommendations – this guide will cover how to secure your chip in its motherboard socket, how to apply thermal paste without drowning it, and tips for installing a cooler. The photos here are all of Intel’s LGA sockets, but I’ve included instructions for installing AMD CPUs as well. This is also one in a series of guides which I’m hoping will both help and encourage you to make your own PC upgrades, if you haven’t before. Some of them, like how to install RAM and how to install an SSD, can be enacted in mere minutes, and can produce serious performance improvements to your personalised rig. Installing a gleaming new CPU will have an even greater effect on games performance, so simply follow the steps below to give your PC a brand new brain.
How to install a CPU in the motherboard
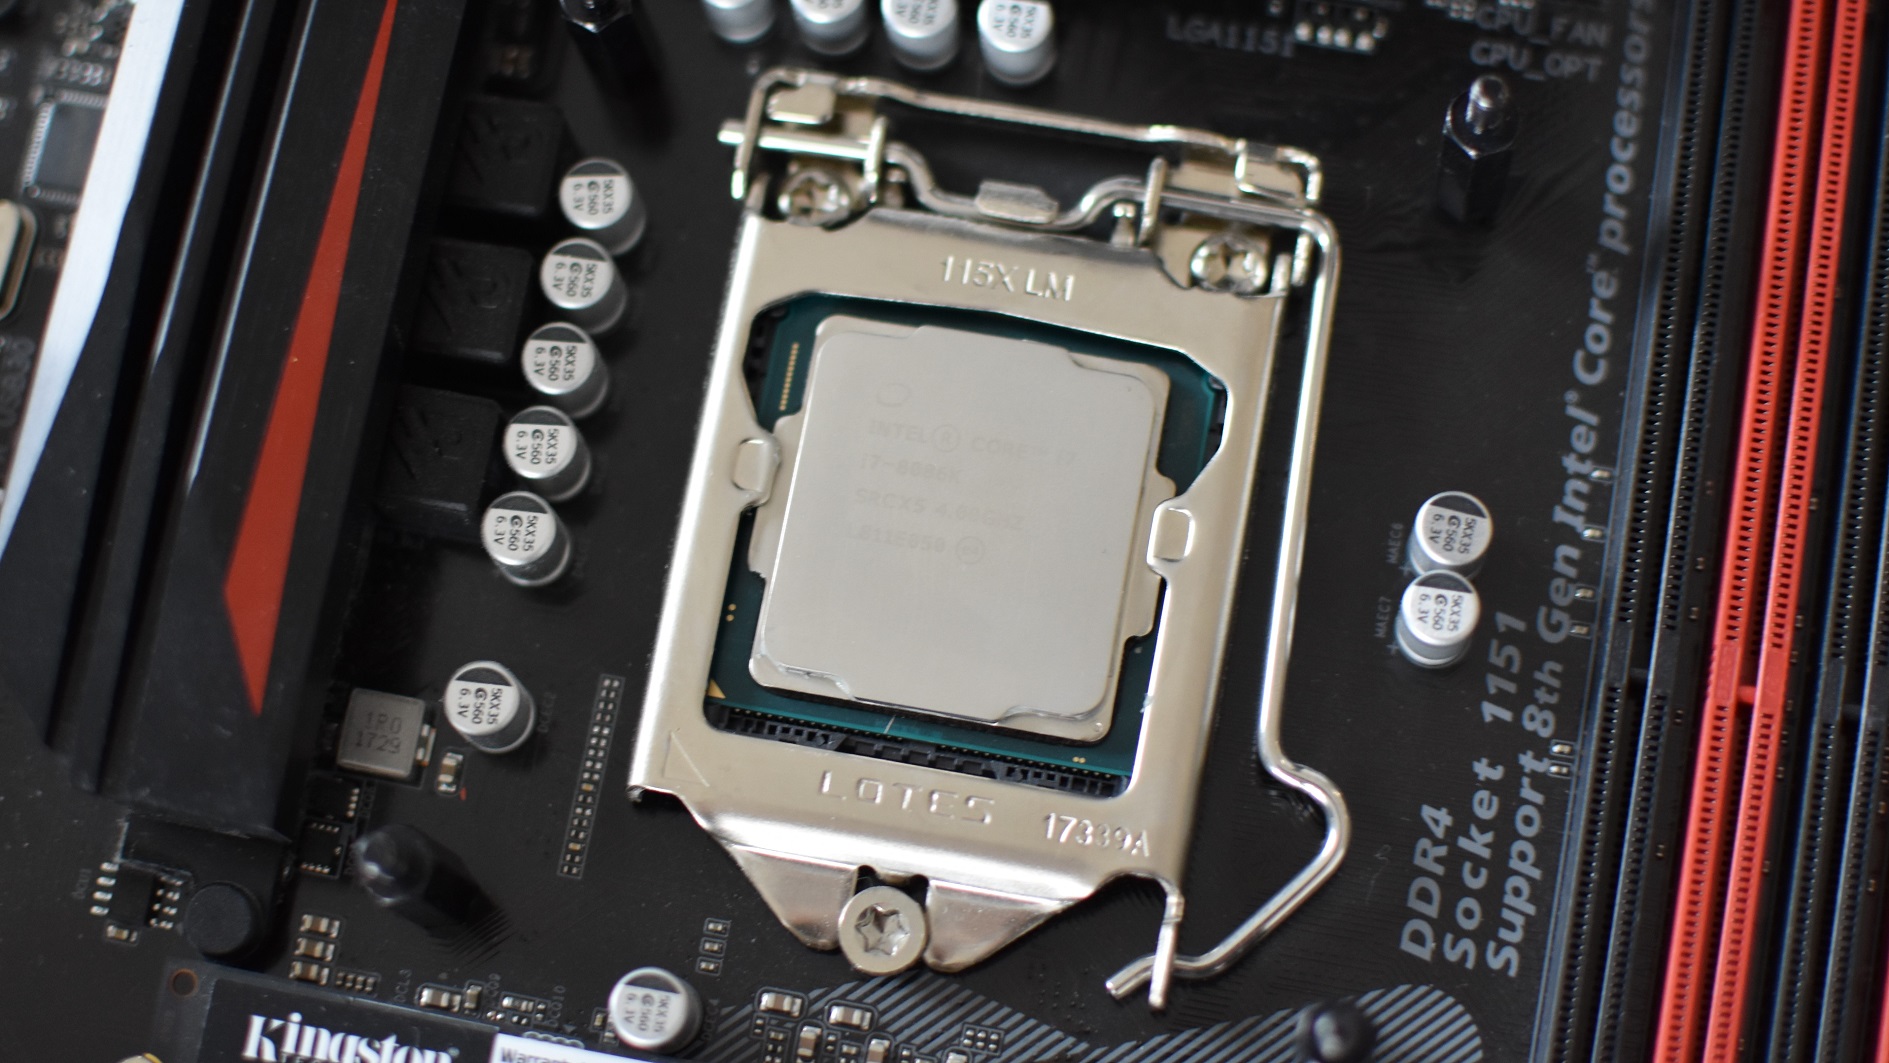
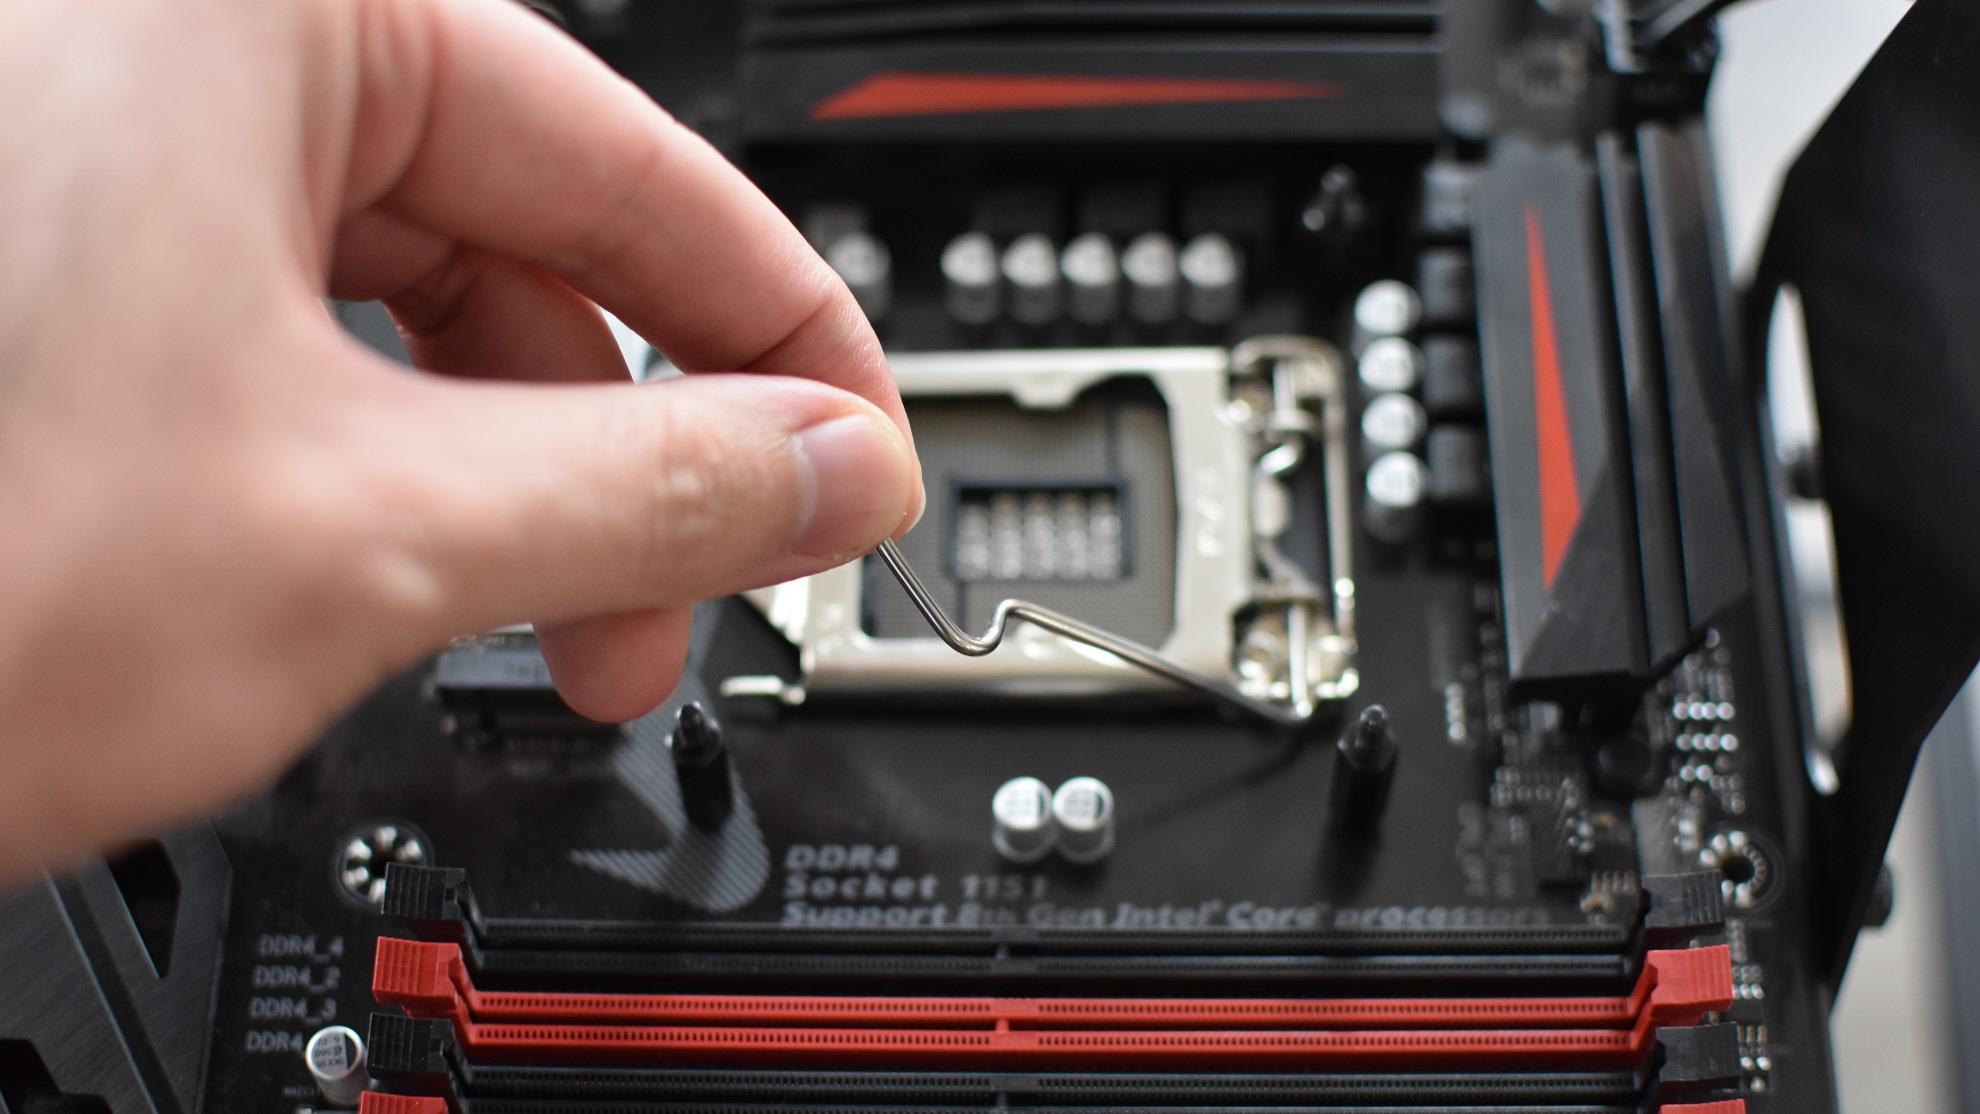
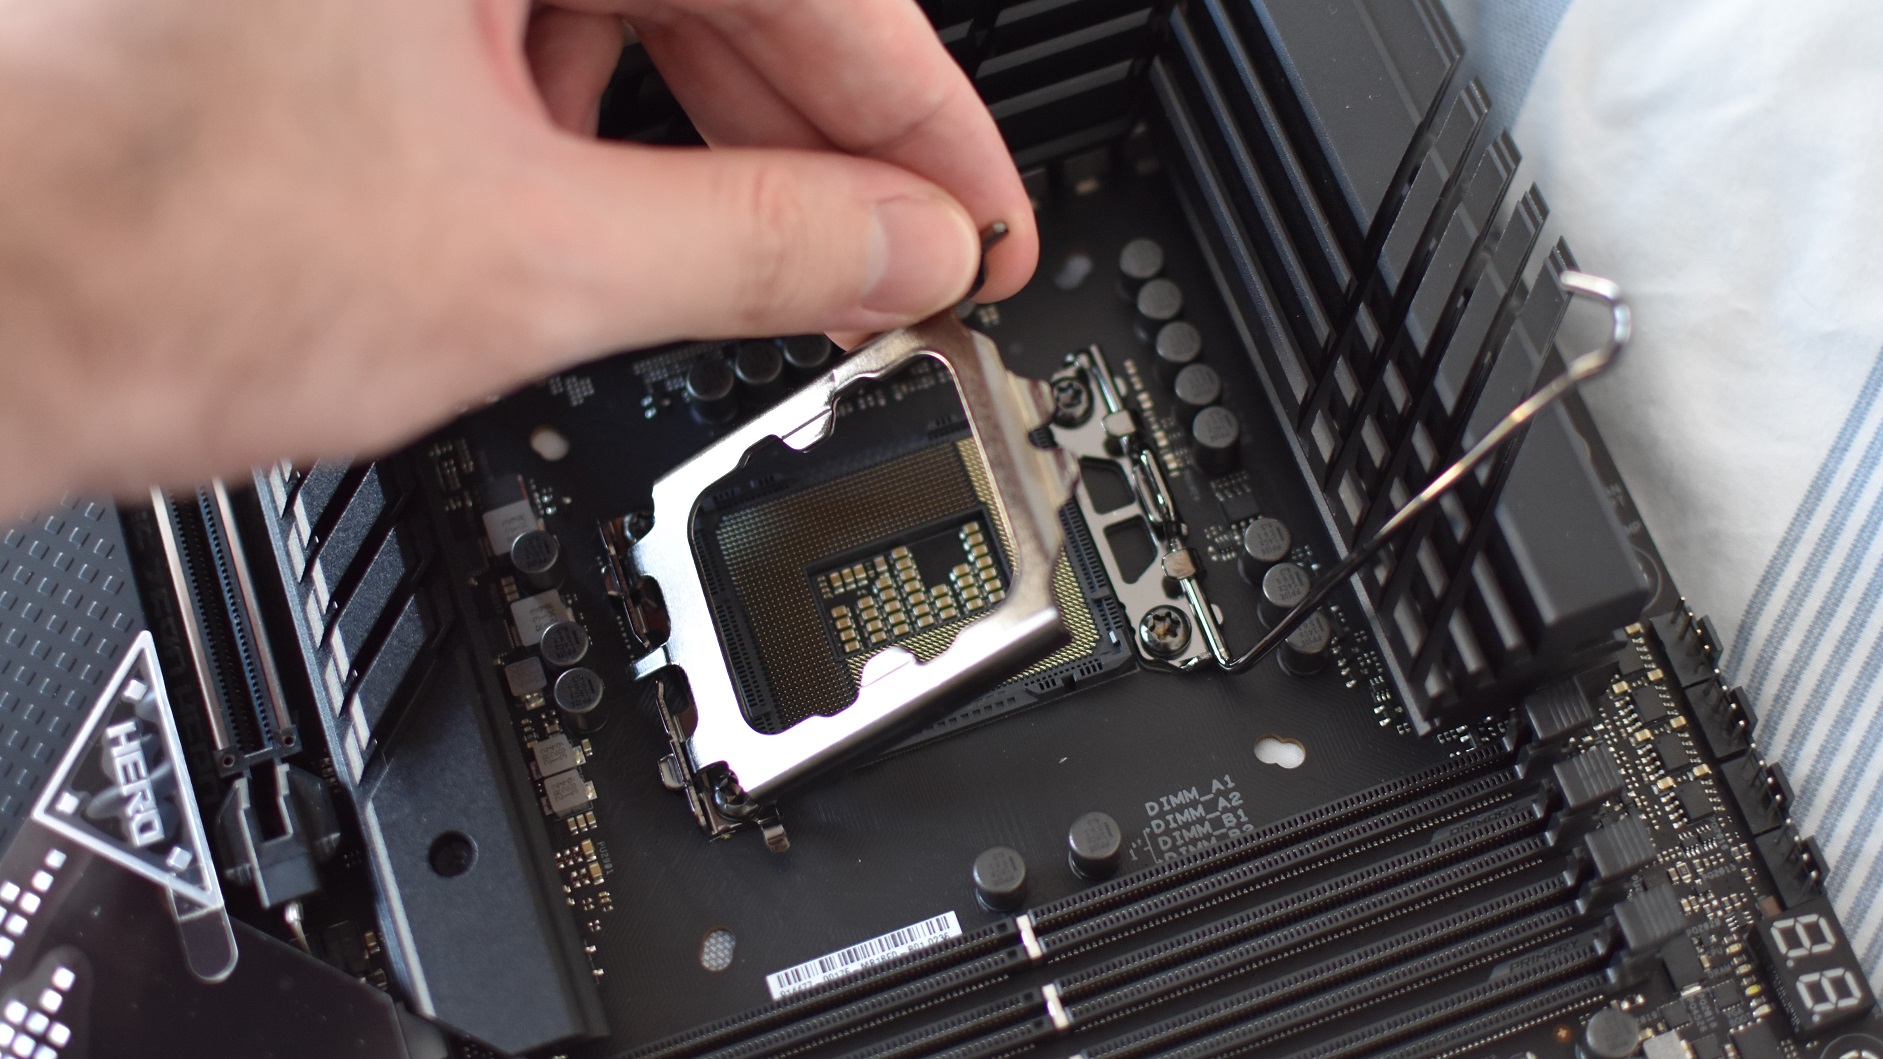
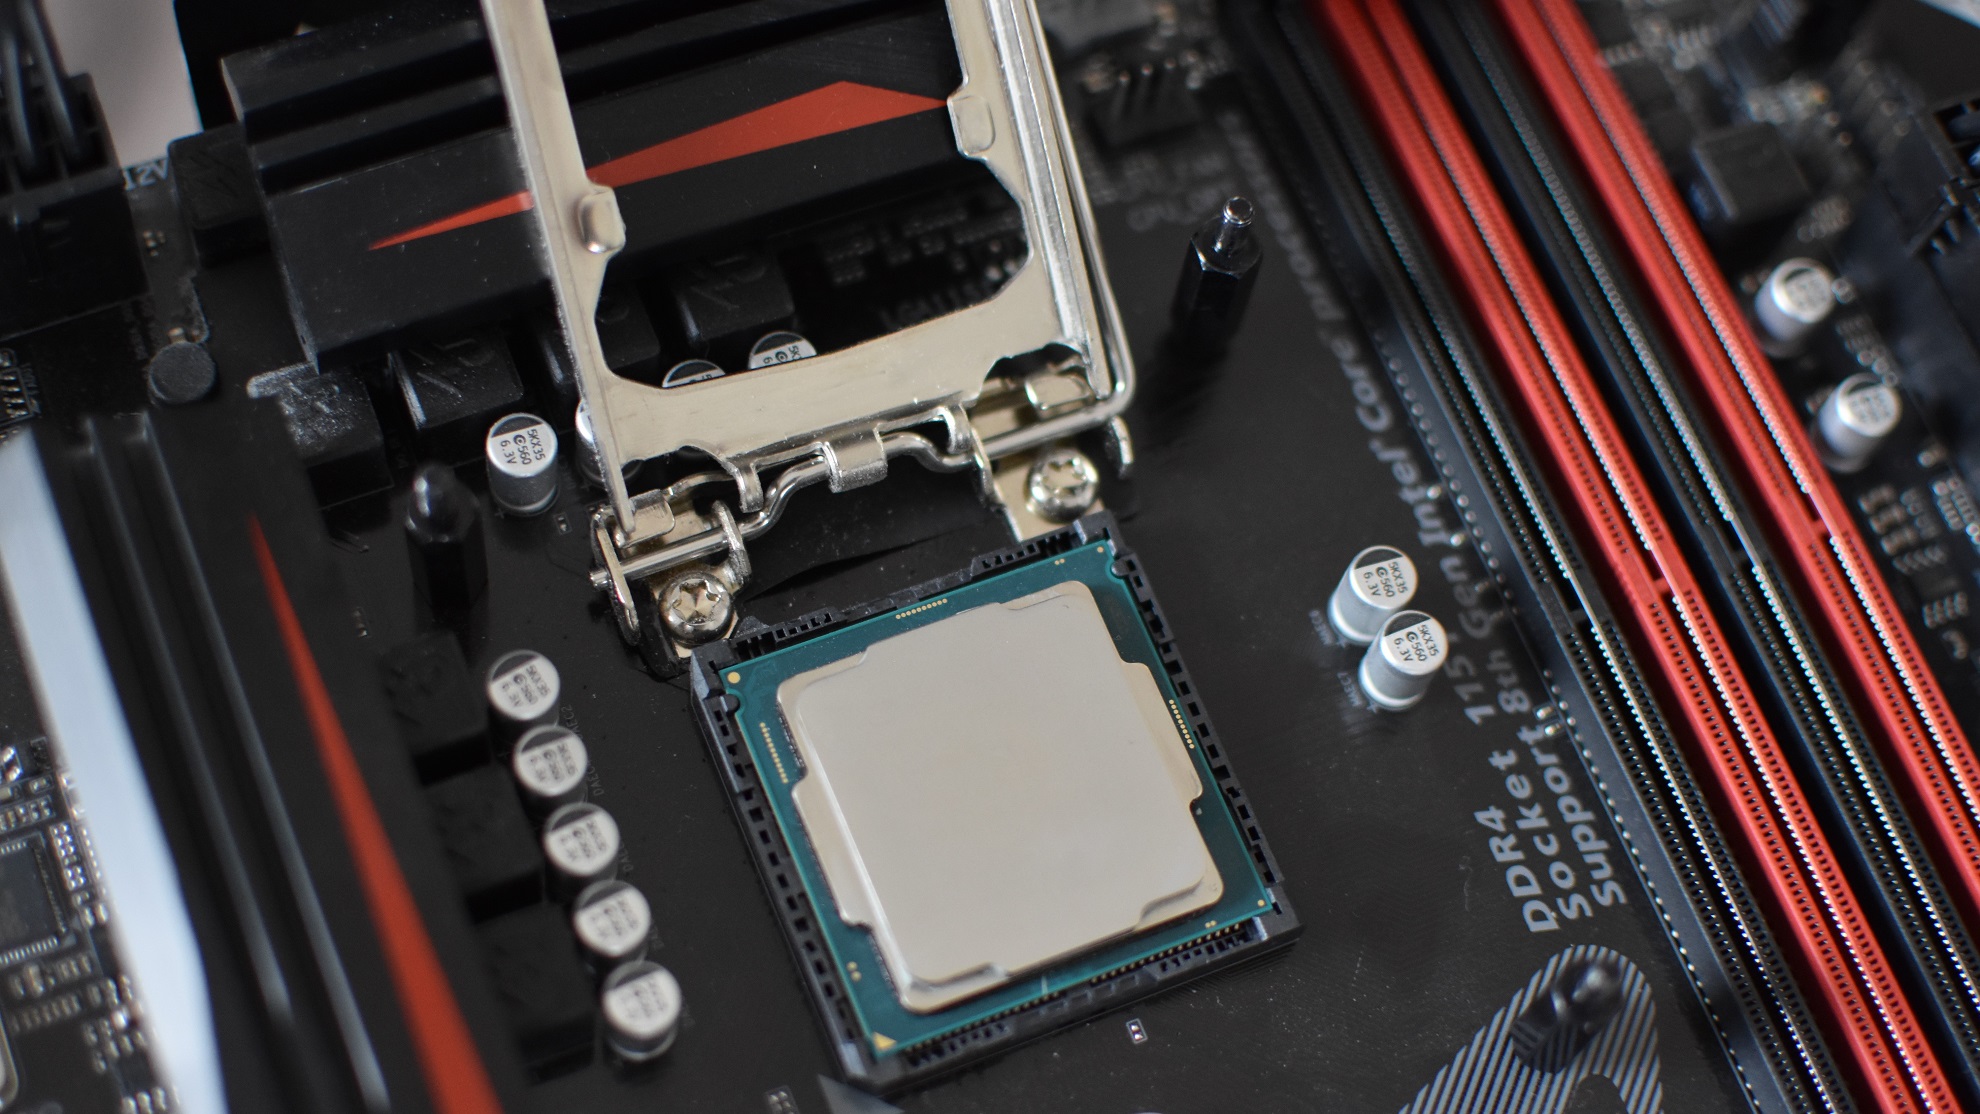
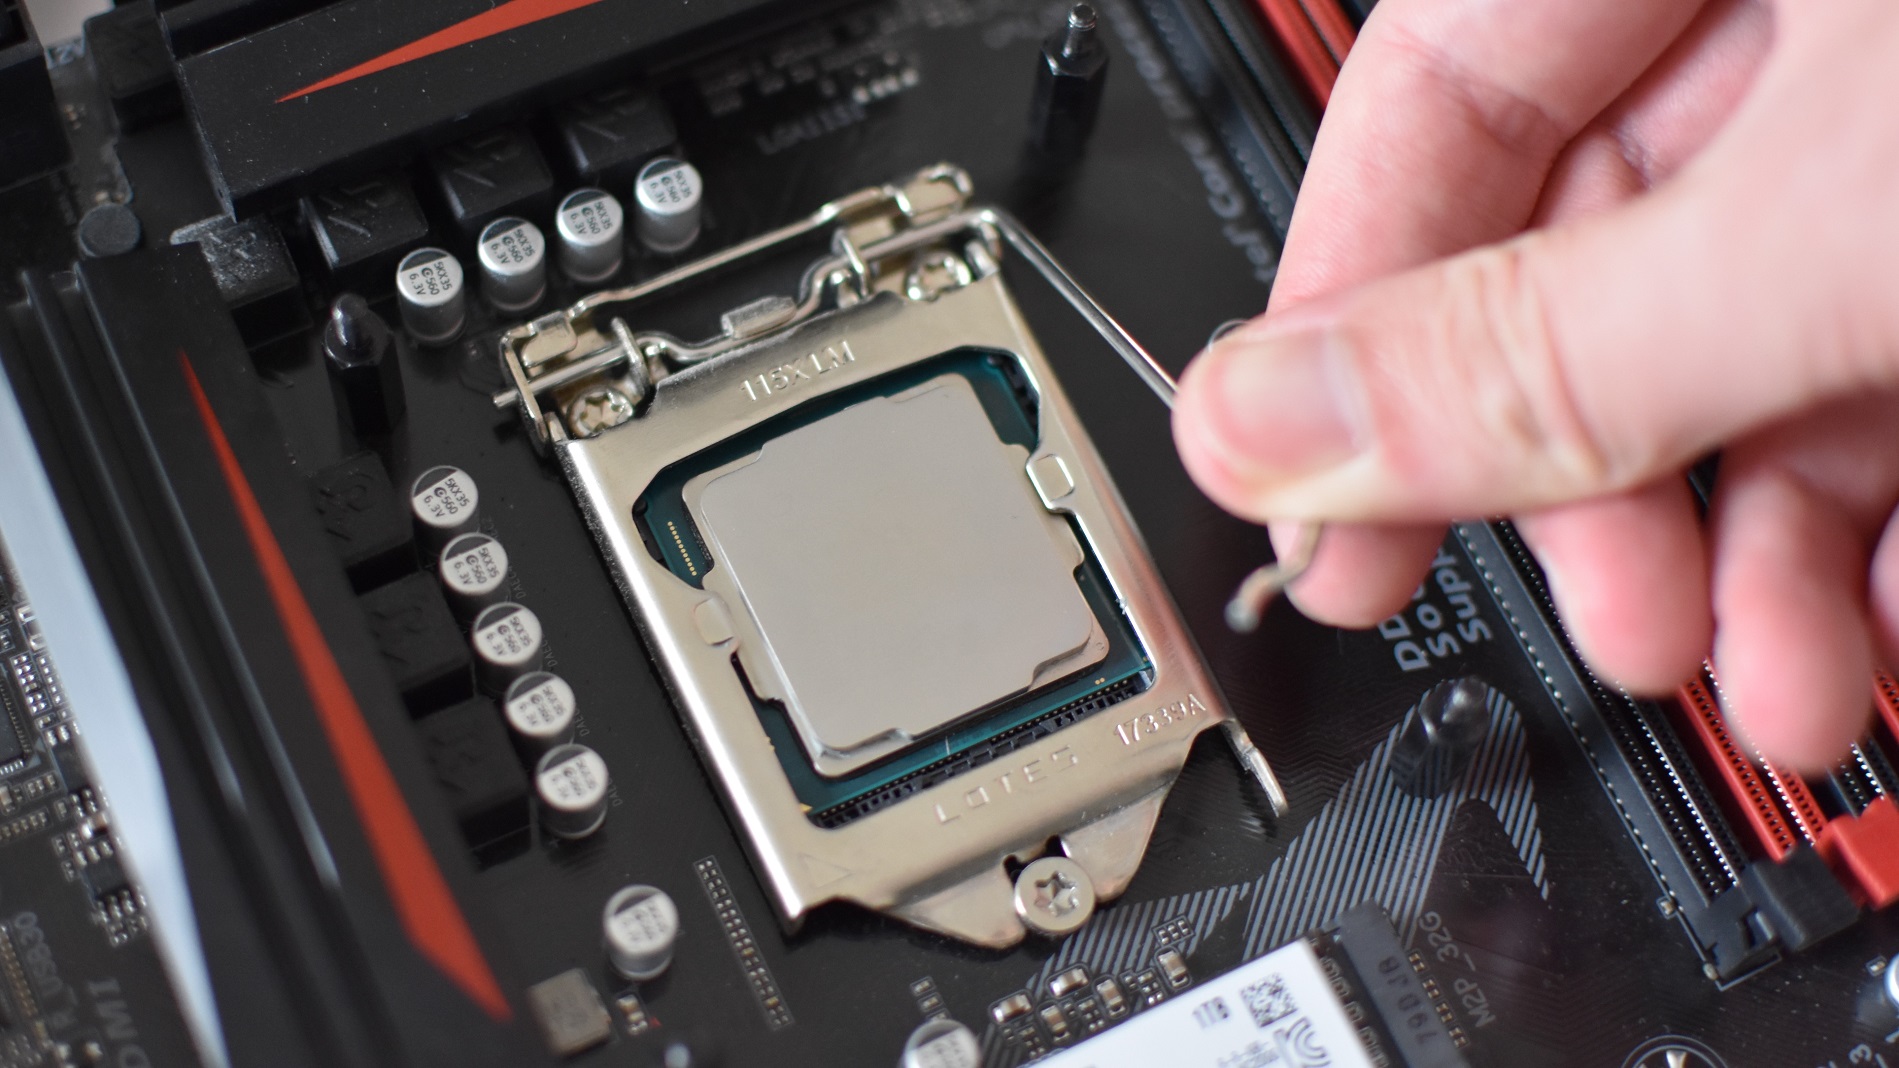
Before you even buy a new CPU, make sure you’re matching it with a compatible motherboard. AMD Ryzen chips usually share the AM4 socket design, but recent models will recent chipsets as well. Intel, meanwhile, introduce new chipsets with every generation, and change sockets much more frequently than AMD, so don’t expect much backwards compatibility. That said, the physical process of slotting an Intel chip into its socket remains consistent. Regardless of your hardware choices, you’ll find this whole process a lot easier if you do it outside of your PC’s case. If you’re adding a new chip to a previously installed motherboard, take out the mobo first. Step 1: For Intel CPUs, push down on the metal arm next to the socket, pull it slightly away from the socket, then lift it up. This will let you lift up the metal frame covering the empty socket. For AMD CPUs, simply lift up the socket’s metal arm as far as it will go. You’ll see the socket slide sideways a little. Step 2: For Intel CPUs, simply plop the processor into the slot. If you’re unsure of how to orient it, look for little notches in the side of the chip that align with tiny protusions in the socket. Once correctly inserted, it should lay down perfectly flat. For AMD CPUs, hold the processor so that the pins on the underside are aligned with the holes in the socket. Lower it down into the socket until it rests completely flush – there shouldn’t be any gap between the chip and the top of the socket. If there is, pull the CPU out and try again. Step 3: For Intel CPUs, lower the metal frame over the inserted chip and back into its starting position. Press the metal arm back down, then tuck it under the catch. This will lock the frame in place, securing the CPU in turn. For AMD CPUs, simply press the metal arm down. This will slide both the socket and the inserted Ryzen chip into the former’s original position, locking both in place.
How to apply thermal paste
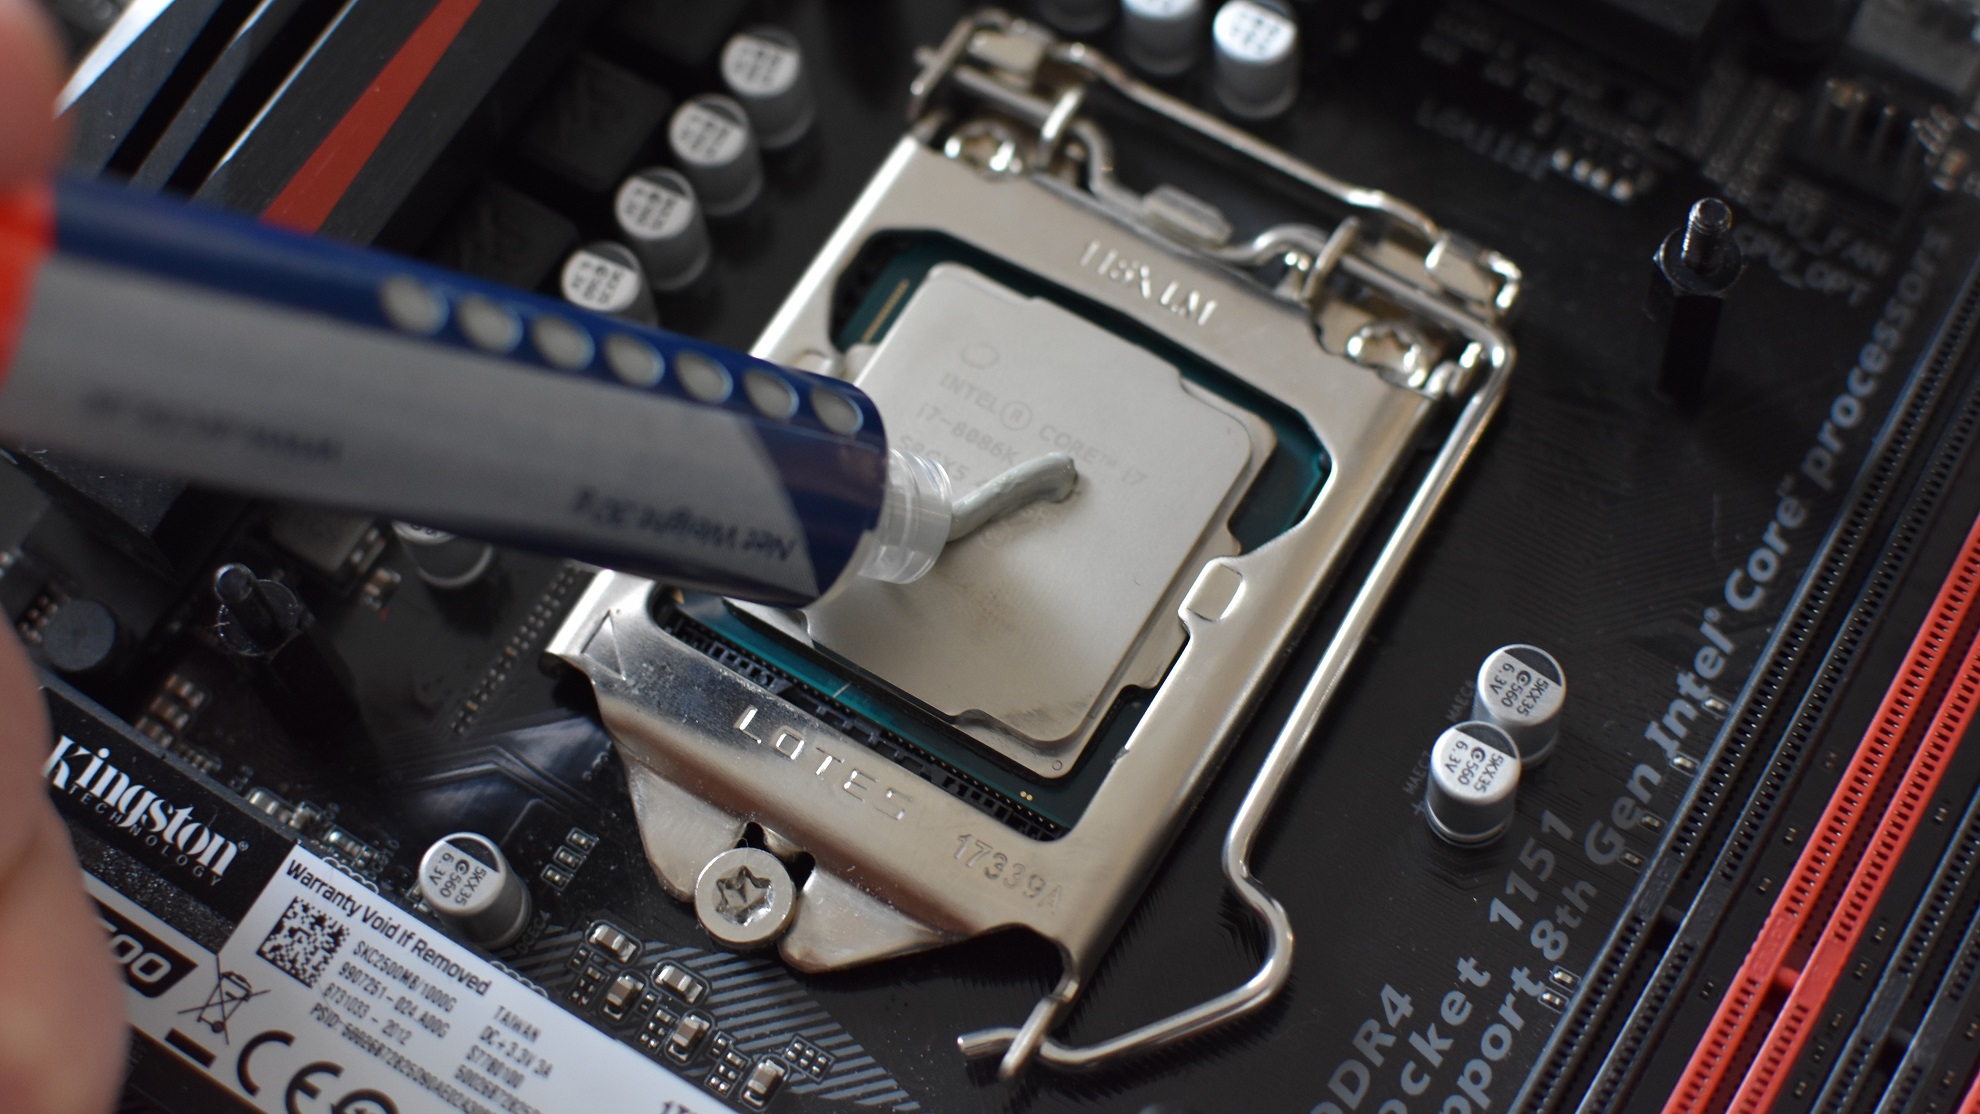
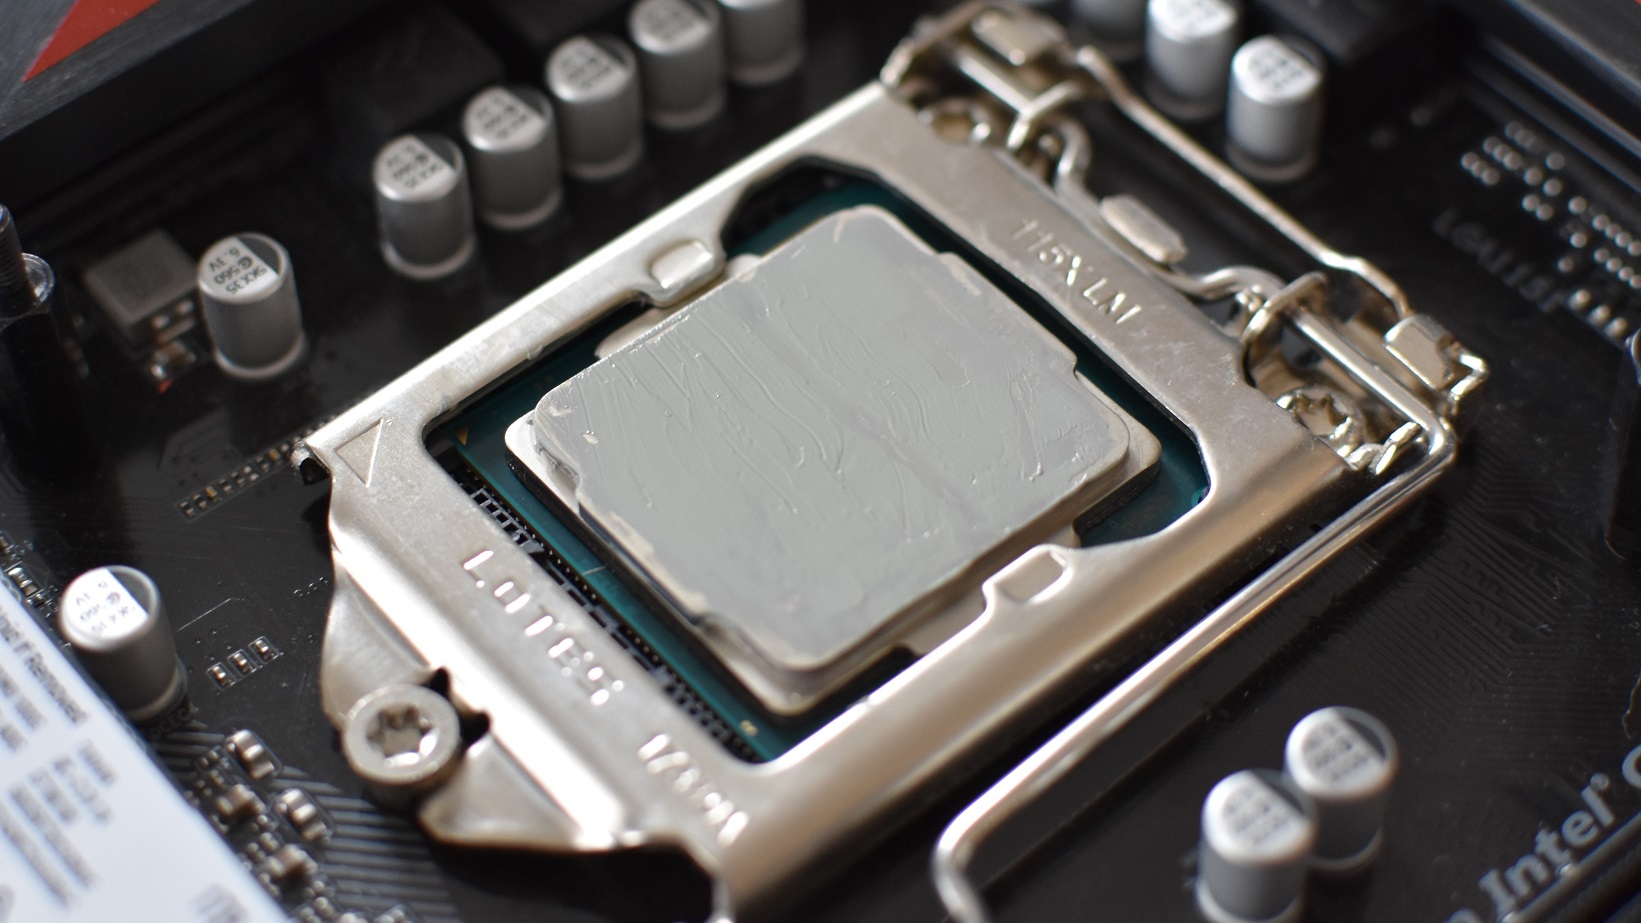
Thermal paste, thermal grease, thermal compound, sticky grey heat transfer goop – whatever you call it, it pays to know to apply it. Even if a lot of CPU coolers come with some pre-applied paste, different CPUs come in different sizes, and the best way to make sure you’re applying the right amount is to do it yourself. But what is the right amount? Ideally you want a very thin, even layer covering the entire IHS (integrated heat spreader, the metallic top ‘layer’ of the CPU that makes contact with the cooler). On Intel chips that fit in LGA 1151 or LGA 1200 sockets, that amounts to about a pea-sized blob, while AMD’s bigger Ryzen chips need a slightly-bigger-than-pea-sized blob. Alder Lake/LGA 1700 processors are taller than 10th and 11th Gen Intel chips, so could also use a tiny bit extra. I personally like to just eyeball the amount, drop it right in the middle of the chip, and install the cooler immediately. The cooler’s contact plate pressing down on the paste will, if the weight is applied evenly, produce a nice, level spread without any extra tools. However, if you want to be absolutely sure you’re covering the whole IHS, you can instead use a piece of card or comically small plastic spatula to spread the paste around before installing the cooler on top. This also lets you scoop up any excess paste; remember we only want a thin layer, as having too much will insulate the processor instead of facilitating heat transfer. Coolers that don’t come with pre-applied paste may instead include a little tube of it in the box, though it’s not expensive to buy. A 4g tube of Arctic MX-5 costs £6 / $7, and is enough for several applications.
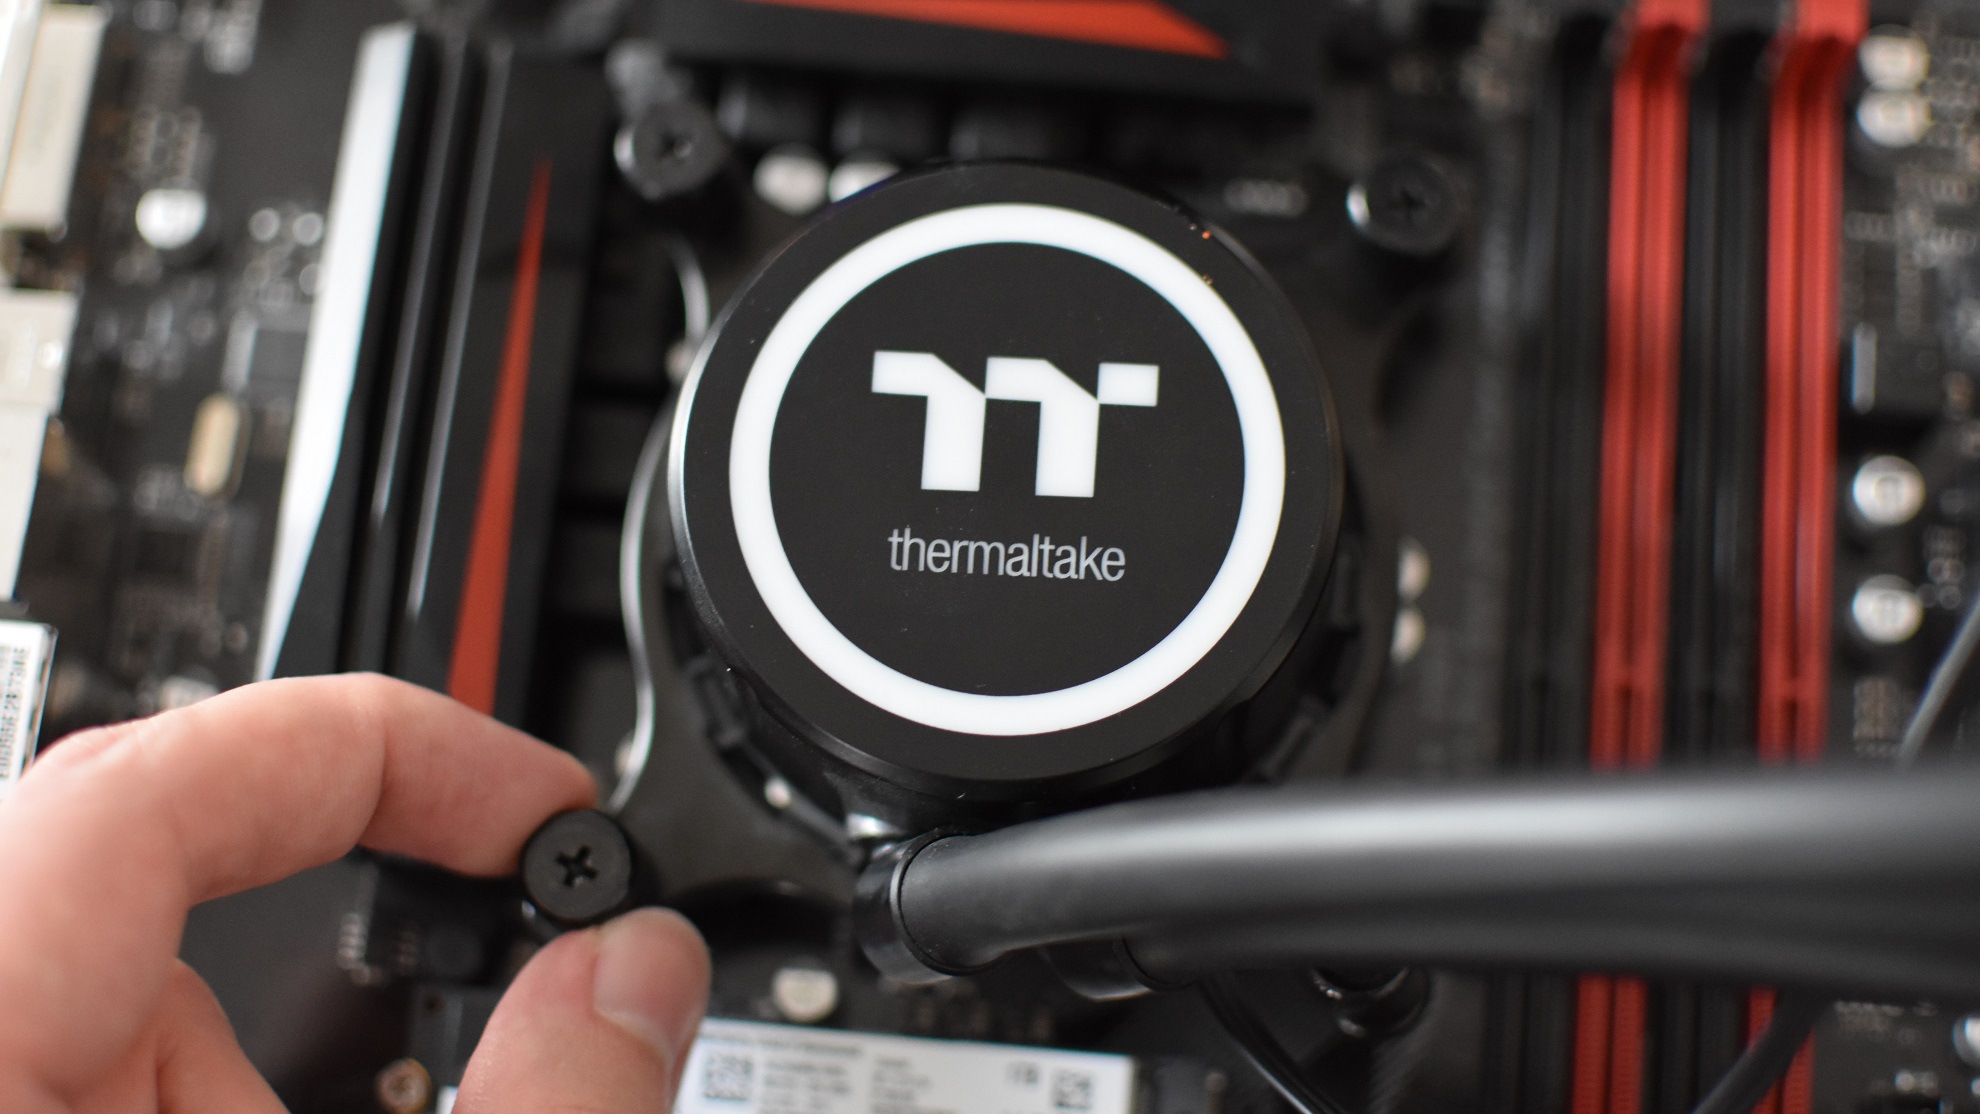
How to install a CPU cooler
Please forgive the lack of true guide-yness in this section, as there’s no single methodology for installing a CPU cooler: not only are there different types of water and air coolers, but manufacturers use distinct mounting methods and kits. I’m planning a more detailed guide on how to install AIO watercoolers for the future, but generally you’re best off following the printed installation instructions for your specific cooler model. That said, I do have some tips that apply to a majority of air coolers and AIO watercoolers…
Assemble everything outside your PC. As much as you can, anyway – if you have an AIO cooler and want to position the fans between the case and the radiator, you usually need to yoke all three together at once with long screws. Otherwise, it’s much easier to get everything put together on a table than in a darkened metal box. When bringing the cooler down on top of the CPU, make sure to apply level pressure, so you’re not smooshing the thermal paste unevenly. If your cooler attaches to the socket with thumbscrews, it might also help if you get all of them partially tightened before you fully tighten them – if you go from 0 to 100 on each screw at a time, that applies uneven pressure as well. If, for whatever reason, you remove the cooler after already making contact with the pasted-up CPU, clean off any thermal paste from both the chip and the cooler and re-apply it. This sounds wasteful but the distressed texture of the used paste makes it unlikely to re-acquire an even layer.